

Introduction: Why You Need a Shower Filter
Are you tired of dry skin, hair fall, or that chlorine smell every time you shower? If yes, you’re not alone. Many households in areas with hard or chlorinated water face these exact problems. But here’s the good news — a shower filter is a simple, affordable, and highly effective solution.
Installing a shower filter can significantly improve your showering experience by removing chlorine, heavy metals, and sediments from your water. In this blog, we’ll walk you through how to install a shower filter, step-by-step — whether you’re a DIY beginner or a seasoned home improvement enthusiast.
What Is a Shower Filter?
A shower filter is a device that attaches to your shower head or water pipe to filter out contaminants like chlorine, limescale, sulfur, and sediment. It helps protect your skin, hair, and overall health by ensuring cleaner water during showers.
Benefits of Using a Shower Filter 🚿
Before diving into the installation process, let’s briefly look at why you need a shower filter in your bathroom:
✅ Healthier Skin and Hair: Chlorine and hard water minerals strip natural oils, making skin dry and hair brittle.
✅ Removes Harmful Chemicals: Filters out chlorine, heavy metals, and VOCs (volatile organic compounds).
✅ Reduces Hard Water Effects: Minimizes limescale buildup on your tiles and shower heads.
✅ Easy Maintenance: Modern filters are compact and easy to replace.
✅ Budget-Friendly Solution: Costs less than whole-house filtration systems.
Types of Shower Filters
There are several types of shower filters available at Cuoll. Here’s a quick breakdown:
- In-Line Shower Filters: These are installed between the shower arm and the showerhead.
- Showerhead Filters: The filter is built into the showerhead.
- Handheld Shower Filters: Comes attached with handheld units for flexibility.
- Universal Shower Filters: Compatible with most standard fixtures.
For this guide, we’ll focus on in-line and showerhead filters, which are most commonly used.
Tools You’ll Need
You don’t need a plumber or any fancy tools to install a shower filter. Here’s what you’ll need:
🔧 Adjustable wrench or pliers
🧤 Teflon tape (Plumber’s tape)
🧼 Old towel or rag
🛠 Your chosen Cuoll shower filter
🚿 Optional: New showerhead
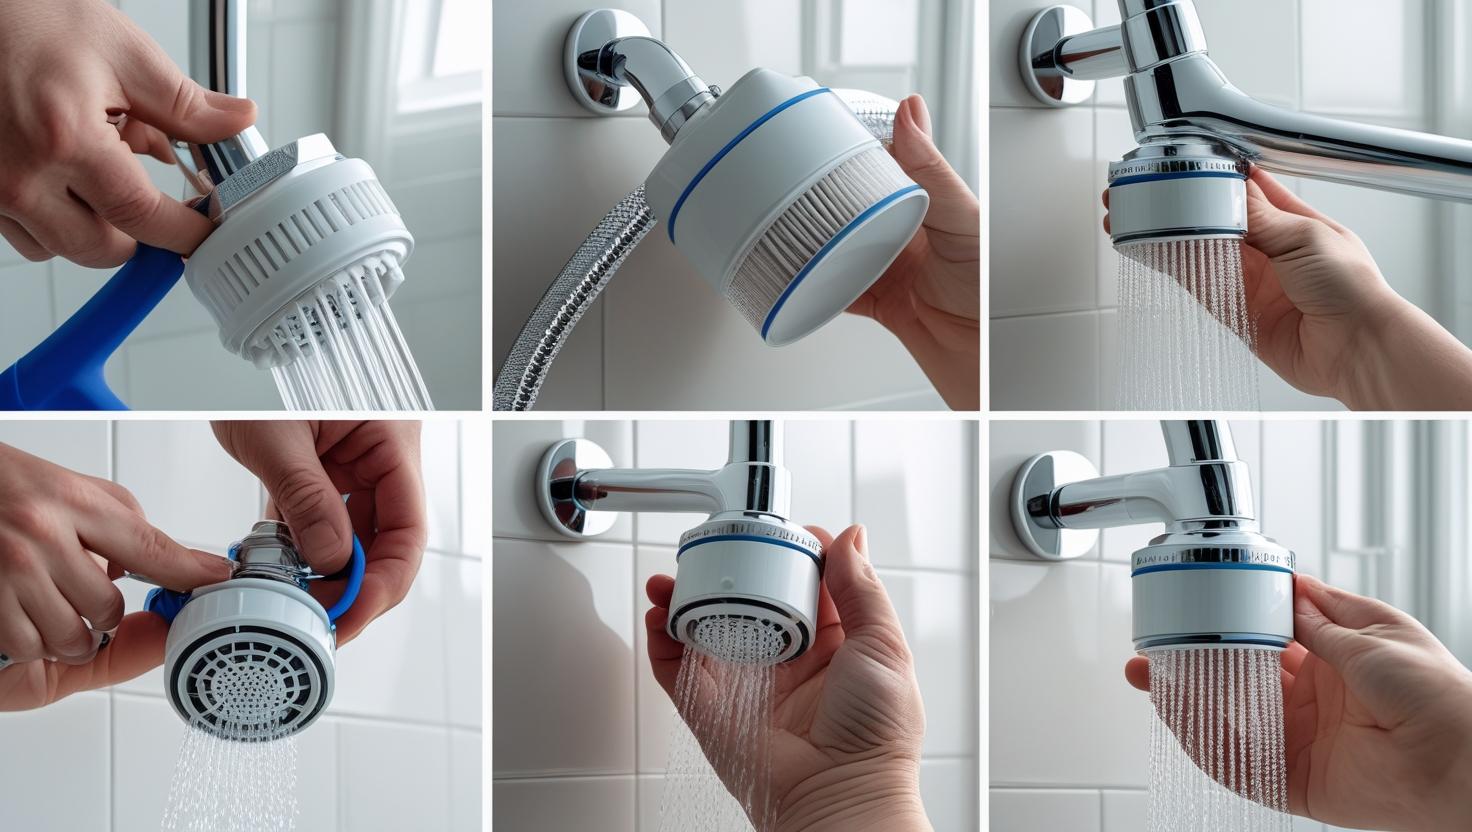
How to Install a Shower Filter (Step-by-Step)
Let’s now get into the heart of this article — how to install a shower filter.
Step 1: Turn Off the Water
Start by turning off the water at the shower knob. You don’t need to shut off the main water supply — just ensure no water is flowing while you work.
Step 2: Remove the Existing Showerhead
Use a wrench or pliers to unscrew the showerhead from the shower arm (the pipe coming out of the wall). Be gentle to avoid damaging the pipe threads. Wrap a cloth around the connection to avoid scratches.
Step 3: Clean the Threads
Use a cloth or rag to clean off any old Teflon tape or mineral buildup from the shower arm threads. This ensures a clean and tight seal for your filter.
Step 4: Apply Teflon Tape
Wrap plumber’s tape around the shower arm threads 2–3 times in a clockwise direction. This helps prevent leaks and ensures a tight seal.
Step 5: Attach the Shower Filter
Now screw the shower filter directly onto the shower arm. Make sure it’s aligned properly and tighten by hand. You can use a wrench for a snug fit but avoid over-tightening.
💡 Tip: If your filter has a flow direction, make sure to follow it (inlet/outlet marked).
Step 6: Attach the Showerhead
Screw your showerhead onto the filter. Again, apply Teflon tape if necessary. Tighten gently with a wrench.
Step 7: Run Water and Check for Leaks
Turn on the water to test your installation. Let the water run for a few minutes to flush out any carbon particles (especially in new filters). Check for leaks and tighten connections if needed.
How to Install a Handheld Shower Filter
If you’re using a handheld shower filter from Cuoll, follow these slightly modified steps:
- Remove the handheld unit from the bracket.
- Unscrew the hose from the shower pipe.
- Attach the filter between the pipe and the hose.
- Reconnect the hose and handheld unit.
- Test for leaks and enjoy your filtered shower.
Installation Tips & Troubleshooting 🔍
💡 Water Pressure Dropped?
Some filters may slightly reduce water pressure. Choose Cuoll filters designed for high-flow performance.
💡 Leaking Filter?
Check the Teflon tape. Reapply if needed and tighten connections.
💡 Filter Won’t Fit?
Make sure your filter is compatible with your pipe size (most are 1/2″ NPT). Use an adapter if required.
💡 Strange Smell?
It’s common for carbon-based filters to emit a slight smell for the first few uses. It disappears after a few showers.
How Often Should You Replace a Shower Filter?
Generally, shower filters last 4–6 months, but this varies depending on:
- Water quality
- Frequency of use
- Filter type and model
At Cuoll, each product listing mentions the recommended replacement period. Set a reminder to change it on time for optimal performance.
Cuoll’s Top-Selling Shower Filters in 2025
Here are some of our best picks:
1. 🌀 CUOLL Universal High-Pressure Shower Filter
- Removes 99% of chlorine and heavy metals
- Works with rain, handheld, and wall-mounted heads
- Easy twist-on design
2. 💧 CUOLL Vitamin C Shower Filter
- Infuses water with Vitamin C for skin and hair health
- Great for sensitive skin
- Comes with aroma cartridges
3. 🚿 CUOLL White Pro Display Filter
- Advanced multi-stage filtration
- Digital screen shows filter life
- Stylish and modern look
🛒 Buy now on Cuoll and enjoy fast delivery and great discounts!
FAQs About Installing Shower Filters
❓ Do I need a plumber to install a shower filter?
No, most shower filters are designed for DIY installation and come with user-friendly instructions.
❓ Will a filter affect my water pressure?
Some filters might slightly reduce pressure, but Cuoll’s high-flow models ensure strong and consistent water output.
❓ Can I use a shower filter with a rain shower?
Yes! Cuoll filters are compatible with rain, wall-mounted, and handheld showers.
❓ How do I know it’s time to replace the filter?
Check the water pressure, odor, or filter color change. Many Cuoll filters also have indicator screens or color-coded cartridges.
Final Thoughts: Better Water Starts With a Simple Filter
Knowing how to install a shower filter is a small but essential step toward better skin, healthier hair, and a more comfortable shower experience. It takes just 10 minutes to install — but the benefits can last for months.
At Cuoll, we provide top-rated shower filters that are easy to install, highly effective, and come with detailed guides and customer support.
💧 Ready to upgrade your shower today?
Visit Cuoll and browse our best-selling filters now!