

Are you tired of dealing with dry skin, dull hair, or hard water stains in your bathroom? If so, a shower filter could be the game-changing solution you’ve been looking for. In this complete guide, we’ll walk you through how to install a shower filter in your bathroom without any professional help. Whether you’re a beginner or someone who wants to upgrade your bathroom experience, this post covers everything — from the benefits of a shower filter to installation tips and maintenance advice.
Let’s dive in!
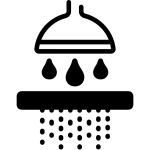
🔍 What is a Shower Filter?
A shower filter is a device that attaches to your showerhead or shower arm to filter out harmful contaminants from water. These can include:
- Chlorine
- Heavy metals (like lead, mercury)
- Bacteria
- Pesticides
- Sediment
- Hard minerals (calcium and magnesium)
By removing these impurities, a shower filter helps protect your skin, hair, and overall health.
🚿 Why Do You Need a Shower Filter?
Before jumping into the steps on how to install a shower filter, it’s important to understand why installing one is a wise decision:
✅ 1. Healthier Skin and Hair
Chlorine and hard minerals can dry out your skin and cause your hair to become brittle. A shower filter removes these substances, leading to softer skin and shinier hair.
✅ 2. Reduces Itching and Skin Irritation
If you suffer from skin conditions like eczema or psoriasis, filtered water can significantly reduce irritation.
✅ 3. Prevents Respiratory Issues
Chlorine vapor can cause respiratory problems during a hot shower. A shower filter removes chlorine to help you breathe cleaner steam.
✅ 4. Extends the Life of Your Bathroom Fixtures
Filtered water prevents lime scale and corrosion, making your showerhead and tiles last longer and look cleaner.
✅ 5. Safer for Babies and Sensitive Skin
Children and babies have more sensitive skin. Installing a shower filter ensures they are exposed to cleaner, safer water.
🛠️ How to Install a Shower Filter – Step-by-Step Guide
Now, let’s get to the main part of this blog — how to install a shower filter. Whether you’re using a handheld shower, wall-mounted shower, or a filter for a bathtub faucet, the installation process is quite simple.
🔧 What You’ll Need:
- Your new shower filter
- Adjustable wrench or pliers
- Plumber’s tape (Teflon tape)
- A cloth (to protect the finish on fixtures)
Step 1: Choose the Right Shower Filter
There are different types of shower filters available in the market:
- In-line filters (installed between the pipe and the showerhead)
- Showerhead filters (showerhead and filter combined)
- Handheld filters
- Bathtub faucet filters
Pick one that matches your existing setup. If you’re shopping from Cuoll, we offer premium in-line and handheld filters that suit most standard fittings.
Step 2: Turn Off the Water Supply
You don’t need to shut off the water supply for your entire house. Just ensure that the shower faucet is turned off and there is no water flow when you start the installation.
Step 3: Remove the Existing Shower Head
Use an adjustable wrench to loosen the showerhead from the shower arm (the pipe sticking out of the wall). Wrap the cloth around the fitting to avoid scratching the metal.
Step 4: Clean the Shower Arm Threads
Once you’ve removed the old showerhead, clean the threads of the shower arm to remove any old plumber’s tape, dirt, or mineral buildup. This helps in creating a tight seal for the filter.
Step 5: Apply Plumber’s Tape
Wrap 2–3 layers of Teflon tape (plumber’s tape) around the threads in a clockwise direction. This prevents any leaks after installation.
Step 6: Attach the Shower Filter
Now, screw the shower filter onto the shower arm where the showerhead used to be. Tighten it by hand first, and then use the wrench if needed — but don’t over-tighten it.
Step 7: Attach the Shower Head
Next, screw your existing or new showerhead onto the open end of the filter. Again, use plumber’s tape if necessary for a tighter seal.
Step 8: Test for Leaks
Turn on the shower and check for leaks around the connections. If water is leaking, turn it off, remove the fittings, and reapply Teflon tape.
Step 9: Flush the Filter
Some filters need to be flushed before first use. Run water through the filter for 5–10 minutes to remove any loose carbon particles or debris.
🧼 How to Install a Shower Filter in a Bathtub Faucet
Some people prefer to use shower filters for bathtub faucets to fill tubs with clean water, especially when bathing babies. Here’s how:
- Buy a faucet-compatible bath filter (available on Cuoll)
- Screw it onto the faucet spout using an adapter if needed.
- Let water run through it before first use.
- Replace filter cartridges as per manufacturer’s instructions.
🔄 How Often Should You Replace Shower Filter Cartridges?
A common question after installing a shower filter is about maintenance. Most filters last around 6 months or 10,000–15,000 gallons of water. However, it depends on:
- Water quality in your area
- Shower usage frequency
- Type of filter
📌 Cuoll’s premium filters come with indicator screens or date markers to help you track when a replacement is due.
🧰 Common Installation Mistakes to Avoid
To make sure your shower filter performs well, avoid these errors:
- Over-tightening connections (can cause cracks)
- Skipping plumber’s tape (can cause leaks)
- Not flushing the filter before first use
- Using incompatible parts (make sure your filter matches your shower type)
🛒 Best Shower Filters Available at Cuoll
At Cuoll, we offer a wide variety of high-quality shower filters designed to protect your health and enhance your bathing experience:
🔹 Cuoll White Pro Bath Ball Filter
- Screen display for real-time filtration monitoring
- Easy installation
- BPA-free and skin-friendly
- Price: $49.99
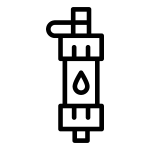
🔹 Cuoll In-Line Shower Filter
- 15-stage filtration system
- Ideal for hard water areas
- Universal fitting
🔹 Cuoll Handheld Filter with Soft Spray
- For sensitive skin and babies
- Easy to hold and use
- Detachable for quick cleaning
Visit our Cuoll Store to explore more bathroom water filtration products, including bathtub water filters, faucet filters, and more.
📋 Final Thoughts: Why You Should Install a Shower Filter Today
Installing a shower filter is one of the simplest yet most powerful upgrades you can make to your bathroom. From improving skin and hair health to protecting your fixtures, the benefits are many. And the best part? You don’t need a plumber to do it.
Now that you know exactly how to install a shower filter, what are you waiting for? Make your daily shower a cleaner, healthier experience with filters from Cuoll — your trusted destination for bathroom, water purification, and home improvement solutions.
🔎 Frequently Asked Questions (FAQ)
❓How do I know which shower filter fits my shower?
Most modern filters are universal and fit standard ½-inch connections. But always check the product specifications or contact our Cuoll support team.
❓Does a shower filter remove fluoride?
Most standard filters remove chlorine, heavy metals, and sediments, but not fluoride. If fluoride removal is important, look for specialized filters.
❓Can I install the filter without tools?
Yes, most Cuoll filters are designed for tool-free installation. A wrench may be needed if your fittings are tight or corroded.
❓Do shower filters affect water pressure?
High-quality filters (like the ones sold at Cuoll) are designed to maintain strong water pressure while purifying water effectively.